DC Motor Speed Control Using PWM Technique
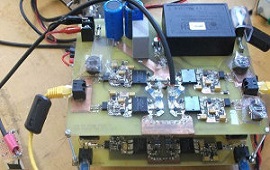
Industrial processes such as wire drawing, textile manufacturing, and conveyor systems require precise speed matching between multiple motor drives. This closed-loop DC motor control system employs a rotary incremental encoder mounted on the motor shaft to provide high-resolution position and velocity feedback. The PLC or microcontroller executes a digital PID algorithm comparing commanded speed against measured speed, outputting a pulse-width-modulated signal to a DC motor driver. The closed-loop architecture rejects disturbances caused by load torque variations and supply voltage fluctuations, maintaining speed regulation within 1% of setpoint. Cascaded control structures—with an inner current loop and outer speed loop—are explored for high-dynamic-response applications.
Components
Arduino Uno
MOSFET IRFZ44N
DC Motor 12V
Potentiometer 10K
16x2 LCD
| Components | Hexkart | Flipkart |
|---|---|---|
| Arduino Uno | Buy Now | Buy Now |
| MOSFET IRFZ44N | Buy Now | Buy Now |
| DC Motor 12V | Buy Now | Buy Now |
| Potentiometer 10K | Buy Now | Buy Now |
| 16x2 LCD | Buy Now | Buy Now |

Arduino Uno

Arduino Uno is a microcontroller board based on the ATmega328P. It has 14 digital input/output pins of which 6 can be used as PWM outputs. These PWM pins can generate a square wave signal with variable duty cycle. The analogWrite() function is used to set the duty cycle from 0 (0%) to 255 (100%). In this project, the analog input from a potentiometer is mapped to the PWM output duty cycle to control motor speed.
MOSFET IRFZ44N
The IRFZ44N is an N-channel power MOSFET capable of switching up to 49A at 55V. It features very low on-resistance (RDS(on)) of only 17.5mΩ, which means minimal heat generation during switching. The MOSFET gate can be driven directly by Arduino's PWM output pin (through a gate resistor). When the PWM signal is HIGH, the MOSFET turns ON fully, allowing current to flow through the motor. When LOW, the MOSFET turns OFF. The rapid switching at the PWM frequency (typically 490Hz or 980Hz on Arduino) provides smooth average voltage control.
Potentiometer
A potentiometer is a three-terminal variable resistor used as a voltage divider. The 10K potentiometer in this project provides an analog voltage between 0V and 5V based on the knob position. The Arduino reads this voltage using its analog input pin (0-1023 range) and maps it to the PWM duty cycle (0-255). Turning the knob clockwise increases the duty cycle and motor speed, while turning counter-clockwise decreases it.
Circuit Diagram
Working Principle
This project uses Pulse Width Modulation (PWM) to control DC motor speed efficiently. A 10K potentiometer connected to an Arduino analog pin provides user input. The Arduino reads the analog value (0-1023) and maps it to a PWM duty cycle (0-255). The PWM signal from Arduino pin drives the gate of an IRFZ44N N-channel MOSFET. When the PWM pulse is HIGH, the MOSFET conducts and motor receives power. When the pulse is LOW, the MOSFET cuts off. The motor's inductance smooths the current, so the motor responds to the average voltage determined by the duty cycle. At 100% duty cycle, the motor receives full voltage for maximum speed. At 50% duty cycle, it receives half the average voltage for moderate speed. The flyback diode across the motor protects the MOSFET from voltage spikes caused by the motor's inductive nature during switching. An LCD displays the current duty cycle percentage and estimated RPM.
Hours
Monday - Saturday: 9:00 AM - 5:00 PM
Sunday: Not Working
Location
2nd Floor, Comptron Arcade, Kallattumukku,
Thiruvananthapuram, Kerala 695012
Book Now
+91 9633118080